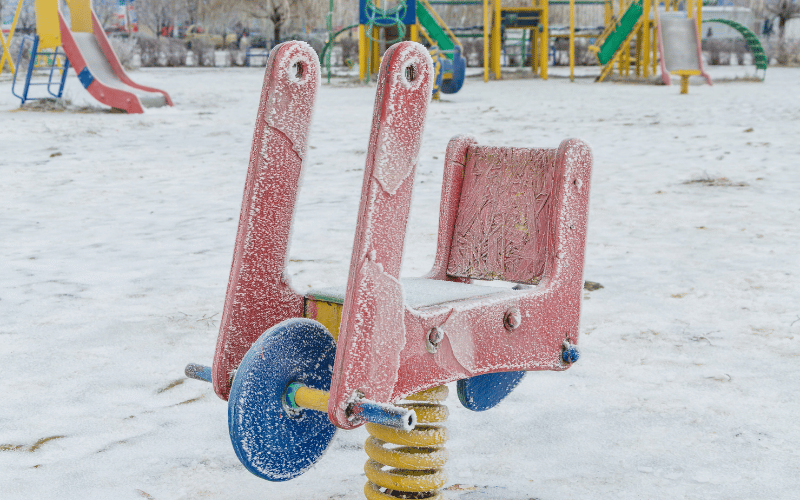
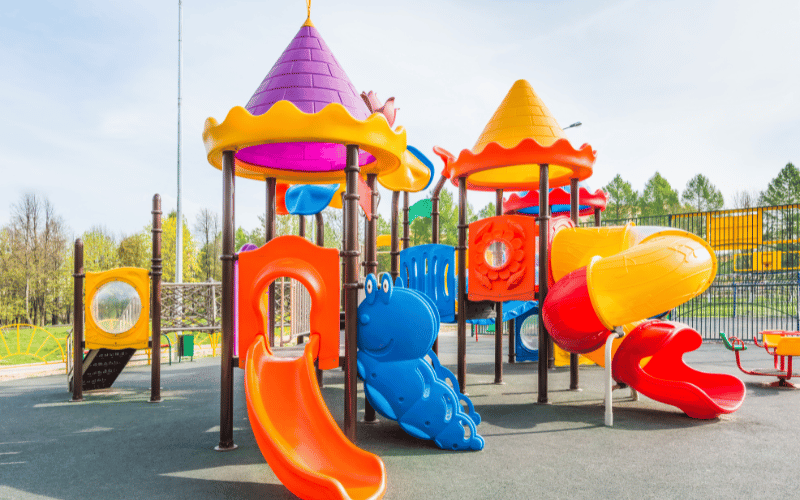
Winterizing your playground is not just a seasonal chore—it’s a critical step in protecting your investment and ensuring the safety of children who use it. Snow, ice, and freezing temperatures can wreak havoc on plastic playground equipment, causing cracks, brittleness, and other damage that shortens its lifespan. I’ve seen countless playgrounds suffer unnecessary wear simply because they weren’t prepared for winter’s harsh conditions. By taking the right steps now, you can avoid costly repairs and keep your playground in top shape for years to come.
This guide walks you through a step-by-step approach to winterizing your playground. You’ll learn how to clean surfaces thoroughly to prevent grime buildup, inspect for damage that could worsen in freezing weather, and store or secure movable parts to protect them from storms. I’ll also show you how to apply protective measures, like UV sprays and rust inhibitors, to shield your equipment from the elements. Whether you’re a homeowner with a backyard playset or a facility manager overseeing a larger playground, these tips will help you safeguard your equipment and ensure it’s ready for action when spring arrives.
Step 1: Thorough Cleaning Before Winter
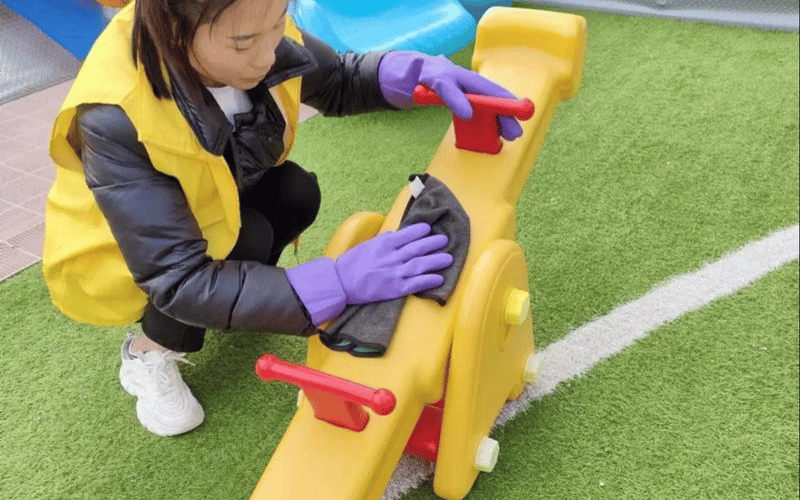
Cleaning your playground before winter isn’t just about appearances—it’s about protecting the integrity of your equipment. Dirt, mold, and mildew can weaken plastic surfaces over time, especially when combined with freezing temperatures. A clean playground is better equipped to handle the challenges of winter weather.
Why Cleaning Is Essential
Think of dirt and debris as tiny invaders that can cause big problems if left unchecked. When grime settles into cracks or crevices, it traps moisture, which can freeze and expand during winter, leading to cracks or brittleness in plastic components. Mold and mildew thrive in damp conditions, further degrading surfaces and creating an unhygienic play environment. Cleaning now prevents these issues and sets the stage for a safer, longer-lasting playground.
How to Clean
Start by removing loose debris like leaves, twigs, and dirt from all surfaces. Use a soft-bristle brush or a handheld blower to clear out hard-to-reach areas, such as the undersides of slides or inside climbing structures. For stubborn grime, mix a mild cleaning solution—such as dish soap and warm water—and apply it with a sponge or soft cloth. Avoid harsh chemicals like bleach, which can damage plastic and pose safety risks for children.
Pay special attention to high-touch areas like handrails, climbing grips, and play panels. These spots often accumulate dirt and germs, so give them an extra scrub. Once cleaned, rinse all surfaces thoroughly with a garden hose or a pressure washer on a low setting to remove any soap residue.
Drying is just as important as cleaning. Use clean towels or allow the equipment to air dry completely before moving on to the next step. Moisture left behind can freeze, leading to cracks or slippery surfaces. By ensuring every surface is clean and dry, you’re giving your playground the best possible start to face the winter months ahead.
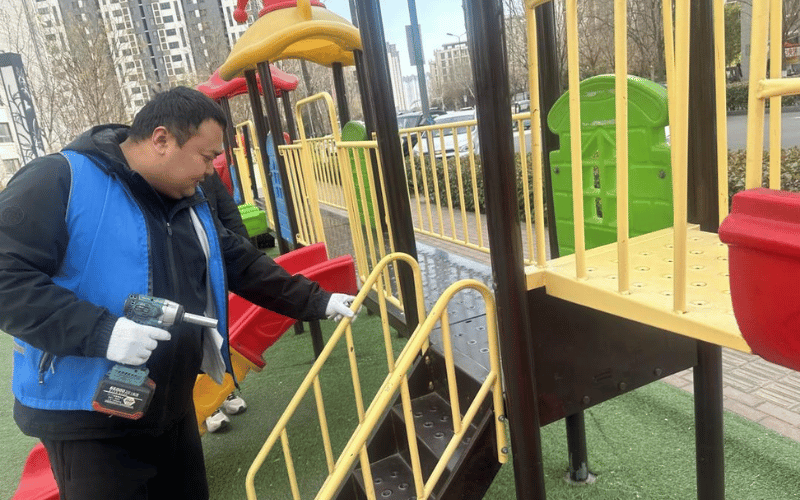
Step 2: Inspect for Damage
Once your playground is clean, it’s time to roll up your sleeves and give it a thorough inspection. Think of this step as a health check for your equipment—identifying and addressing damage now will save you from bigger headaches when winter’s freeze sets in.
What to Look For
Start by examining every inch of your playground, from the tallest slide to the smallest bolt. Look for cracks in plastic components, which can worsen in freezing temperatures. Pay close attention to areas that experience frequent use, such as slides, climbing walls, and handrails. These high-traffic spots are more prone to wear and tear.
Check for loose bolts, screws, or fasteners. These tiny but critical components hold your playground together, and even a slightly loose connection can compromise safety. Inspect metal parts for signs of rust or corrosion, especially at joints and connection points where moisture tends to collect. For wooden structures, look for splintering, rot, or cracks that could weaken the material.
Action Steps
Don’t just identify problems—fix them. Tighten any loose bolts or screws using the appropriate tools, and replace missing hardware immediately. For cracked plastic, use a repair kit designed for playground equipment to seal the damage and prevent it from spreading. If the crack is too large to repair, replace the component entirely to maintain safety.
For rusted metal parts, use a wire brush to remove the rust, then apply a rust inhibitor to protect against further corrosion. Wooden components with minor splintering can be sanded down and treated with a wood sealant, but replace any pieces showing significant rot or structural damage.
Pay extra attention to high-stress areas like joints, fasteners, and connection points. These spots bear the brunt of the playground’s weight and movement, making them more susceptible to damage. A loose joint or weakened fastener can quickly turn into a safety hazard, so address these issues with urgency.
By taking the time to inspect and repair your playground now, you’re not just preparing it for winter—you’re ensuring it remains a safe and durable space for children to enjoy year-round.
Step 3: Disassemble and Store Movable Parts
Winter can be unforgiving to movable playground components, especially those on an outdoor jungle gym, so taking the time to disassemble and store them properly is a crucial step. By removing and safeguarding these parts, you’ll protect them from the elements and ensure they’re ready for use when warmer weather returns.
What to Remove
Focus on any detachable components of your outdoor jungle gym that are particularly vulnerable to winter’s harsh conditions. Swings, chains, slides, ladders, and climbing ropes should all come off. These parts are often the first to show wear from freezing temperatures, moisture, and heavy snow. Don’t forget smaller accessories like handles, seats, or decorative elements that can be easily removed.
As you disassemble, inspect each piece for signs of damage, such as frayed ropes, rusted chains, or cracks in plastic. Address these issues before storing the items to avoid surprises when it’s time to reassemble in the spring.
Storage Tips
Proper storage is just as important as disassembly. Start by labeling each part clearly—use tags, tape, or even a simple marker to note where each piece belongs. This small step will save you hours of frustration when it’s time to put everything back together.
Store all components of your outdoor jungle gym in a dry, temperature-controlled space, such as a garage, shed, or storage room. Moisture is the enemy here, as it can lead to rust, mold, or warping. Use storage bins or racks to keep items organized and off the ground, reducing the risk of damage from accidental bumps or spills.
For metal parts like chains or bolts, consider applying a light coat of lubricant or rust inhibitor before storage. This extra layer of protection will keep them in top condition through the winter months. For plastic or rubber components, ensure they are clean and completely dry before storing to prevent mildew or cracking.
By carefully disassembling and storing movable parts of your outdoor jungle gym, you’re not just protecting your playground—you’re making your spring reassembly process smoother and more efficient. This step ensures your equipment stays in great shape, ready to provide safe and enjoyable play for years to come.
Step 4: Protect Stationary Structures
While movable parts can be stored away, stationary structures must brave the winter elements. Properly protecting these larger components ensures they remain safe, durable, and ready for use when spring arrives.
Covering Large Elements
Think of weatherproof covers as a winter coat for your playground. They shield stationary structures like slides, climbing walls, and platforms from snow, ice, and freezing rain. Choose covers made from durable, waterproof materials like heavy-duty tarps or custom-fitted playground covers. These materials repel moisture and prevent it from seeping into cracks or joints, where it can freeze and cause damage.
Before covering, clean and dry the surfaces thoroughly to avoid trapping dirt or moisture underneath. Pay special attention to areas prone to water pooling, such as the tops of slides or flat platforms. A clean, dry surface ensures the cover does its job without creating additional problems.
Securing Covers
A cover is only as effective as its anchoring. Winter winds can be relentless, so secure covers tightly to prevent them from flapping or blowing away. Use bungee cords, heavy-duty straps, or rope to anchor the cover to the structure. Focus on tying down all edges and corners, ensuring there are no loose sections that could catch the wind.
For added stability, consider using weights like sandbags or water-filled anchors at the base of the structure. These will keep the cover in place even during strong gusts. Check the covers periodically throughout the winter to ensure they remain secure and adjust as needed.
By properly covering and securing stationary structures, you’re giving your playground the protection it needs to withstand winter’s harsh conditions. This step not only prevents damage but also reduces the amount of cleaning and repair work needed when spring rolls around.
Step 5: Prepare the Ground Area
The ground beneath your playground is just as important as the equipment itself. A well-prepared ground area not only enhances safety but also protects the foundation of your playground from winter’s harsh effects.
Clearing and Leveling
Start by clearing the ground of any debris, such as fallen leaves, branches, or trash. These materials can trap moisture, leading to mold, mildew, or even ice buildup. Use a rake or leaf blower to ensure the area is clean and free of obstructions.
Next, check the ground for uneven spots or areas where water tends to pool. These low points can become icy hazards or cause erosion during winter. Level the ground by filling in dips with soil or gravel, and ensure the surface slopes slightly away from the playground to promote proper drainage. If your playground has a drainage system, inspect it for clogs and clear out any blockages to keep water flowing freely.

Winter Ground Cover Options
Once the ground is cleared and leveled, it’s time to add a protective layer. Loose-fill materials like wood mulch or rubber mulch are excellent options for winter. They provide cushioning for falls while also helping to insulate the ground and prevent erosion. Spread the material evenly, maintaining a depth of 9-12 inches to meet safety standards.
For playgrounds with rubber surfacing, inspect the area for cracks or gaps that could expand in freezing temperatures. Patch any damage with a rubber repair kit to maintain a smooth, safe surface. If you’re in an area prone to heavy snow, consider adding a temporary tarp or ground cover over the surface to shield it from excessive moisture.
By preparing the ground area with care, you’re not just protecting the foundation of your playground—you’re creating a safer, more durable environment that can withstand winter’s challenges. This step ensures that when spring arrives, your playground will be ready to welcome families back without missing a beat.
Step 6: Organize and Secure Storage
Proper storage is the final step in ensuring your playground components survive the winter unscathed and are ready for a smooth reassembly in the spring. By choosing the right location and organizing effectively, you’ll save time and protect your equipment from unnecessary wear.
Choosing a Storage Location
Select a storage space that offers protection from extreme temperatures, moisture, and pests. A shed, garage, or basement works well, as long as the area is dry and temperature-controlled. Avoid outdoor storage or spaces prone to dampness, as these conditions can lead to rust, mold, or warping.
Before placing items in storage, inspect the space for potential hazards. Look for leaks, drafts, or signs of rodents, and address these issues to create a safe environment for your equipment. Use shelving units or storage racks to keep items off the ground, reducing the risk of water damage or accidental impacts.
Organizing for Spring
A little organization now will save you hours of frustration when it’s time to reassemble your playground. Group components by type—swings with swings, bolts with bolts, and so on. Use clear storage bins or labeled boxes to keep smaller parts like screws, chains, and fasteners together. For larger items like slides or ladders, attach tags or labels indicating their placement on the playground.
If you’re storing multiple sets of equipment, consider creating an inventory list. Note the location of each item and any repairs or maintenance needed before reassembly. This simple step ensures nothing gets lost or overlooked during the winter months.
For added protection, wrap metal parts in rust-resistant paper or apply a light coat of lubricant to prevent corrosion. Cover plastic components with breathable fabric to shield them from dust while allowing airflow to prevent moisture buildup.
By organizing and securing your storage space, you’re not just putting things away—you’re setting yourself up for an efficient and stress-free spring. This step ensures your playground components remain in excellent condition, ready to provide safe and joyful play for the seasons ahead.
Step 7: Final Pre-Winter Check
Before you officially declare your playground ready for winter, it’s essential to take one last walk-through. This final check ensures every step has been completed thoroughly and sets you up for a seamless transition when spring arrives.
Double-Check All Steps
Start by revisiting each area of your playground with a critical eye. Are all movable parts safely stored in a dry, organized space? Have stationary structures been properly covered and secured against the elements? Inspect the ground area one more time to confirm it’s clear of debris and properly leveled.
Pay close attention to the details. For example, check that bolts and fasteners on stationary equipment are tightened securely and that no cracks or damage were missed during earlier inspections. If you applied protective coatings to metal, wood, or plastic components, ensure they’ve dried completely and are evenly applied.
This is also the time to test the security of covers and anchors. Tug gently on straps, bungee cords, or weights to confirm they’re holding firm. If you notice any loose ends, adjust them now to prevent issues during winter storms.
Plan for Spring Setup
While everything is fresh in your mind, take a few minutes to prepare for spring. Create a detailed checklist for reassembly and maintenance tasks. Include notes on where each component is stored, any repairs that need to be addressed, and the order in which items should be reinstalled.
Label this checklist clearly and store it in an easy-to-find location, such as taped to the inside of your storage area or saved digitally on your phone. This small step will save you time and effort when it’s time to bring your playground back to life.
If you’ve identified any parts that need replacing, order them now to avoid delays in the spring. Having everything ready to go ensures your playground will be up and running as soon as the weather allows.
By completing this final pre-winter check, you’re not just wrapping up the process—you’re ensuring that every detail has been addressed and that your playground is fully prepared to face the winter months. This step ties everything together, giving you peace of mind and a head start on the next season.
FAQs
How cold is too cold for a plastic playground?
Plastic playground equipment can become brittle in freezing temperatures, typically below 32°F (0°C). Prolonged exposure to extreme cold, especially temperatures below 20°F (-6°C), increases the risk of cracks or breakage. If your area experiences harsh winters, take extra precautions like applying UV protectant and inspecting for damage before the cold sets in.
Should I disassemble my entire playground for winter?
You don’t need to disassemble the entire playground, but you should remove and store movable parts like swings, slides, and climbing ropes. These components are more vulnerable to damage from freezing temperatures, snow, and ice. Stationary structures can remain in place but should be covered and secured to protect them from the elements.
What type of cover works best for plastic playgrounds?
Weatherproof covers made from heavy-duty, waterproof materials like vinyl or polyethylene work best for plastic playgrounds. Look for covers with UV protection to prevent fading and brittleness caused by winter sun exposure. Ensure the cover is breathable to reduce moisture buildup and secure it tightly to prevent wind damage.
Can sandbox toys stay outside during winter?
It’s best to store sandbox toys indoors during winter. Freezing temperatures can cause plastic toys to crack, and moisture can lead to mold or mildew. Clean and dry the toys thoroughly before storing them in a sealed container or bin to keep them in good condition for the next season.
How do I prevent mold on stored playground parts?
To prevent mold, ensure all parts are completely clean and dry before storage. Use breathable fabric covers or storage bins with ventilation to allow airflow. Avoid storing items in damp or humid areas, and consider using silica gel packets or moisture absorbers in storage containers to keep humidity levels low.
When should I start winterizing my playground?
Begin winterizing your playground in late fall, before the first frost or snowfall. This timing ensures you have enough time to clean, inspect, and protect your equipment without rushing. Starting early also allows you to address any repairs or replacements before winter fully sets in.
Are there parts that must always be stored indoors?
Yes, certain parts should always be stored indoors, including swings, chains, climbing ropes, and any detachable plastic or metal components. These items are more susceptible to damage from freezing temperatures, rust, or wear caused by snow and ice. Storing them in a dry, temperature-controlled space ensures they remain in good condition for spring reassembly.
Conclusion
Winterizing your playground shields it from harsh winter conditions, keeping it safe, durable, and free from costly damage. By cleaning, inspecting, protecting, and storing components properly, you ensure the equipment stays in top condition and ready for use when spring arrives. Take action now to follow these steps, and you’ll enjoy a playground that remains a secure and enjoyable space for years to come.