Outdoor play is essential for children’s physical health, mental well-being, and social development. Yet, many families face the challenge of limited access to traditional playgrounds, whether due to location, cost, or availability. This can leave parents wondering how to provide their kids with the same opportunities for movement, creativity, and exploration right at home.
The good news is that you don’t need a commercial playground to create a fun and engaging outdoor space. With a bit of creativity and some budget-friendly DIY projects, any backyard—no matter the size—can transform into a play haven. From obstacle courses made with household items to imaginative play zones crafted from repurposed materials, the possibilities are endless.
This article focuses on practical, safe, and creative ideas that encourage kids to move, imagine, and explore. Whether you’re building a simple sensory path or setting up a mini adventure course, these projects will inspire hours of outdoor fun without breaking the bank. Let’s dive into how you can turn your backyard into a space where play and imagination thrive.
Active Play Zones: Encouraging Movement and Gross Motor Skills
Creating active play zones in your backyard is a fantastic way to help kids develop their gross motor skills while keeping them engaged and energized. With a few simple materials and a bit of creativity, you can design spaces that encourage climbing, balancing, and exploring. Let’s dive into some detailed DIY projects that will transform your backyard into a hub of active play.
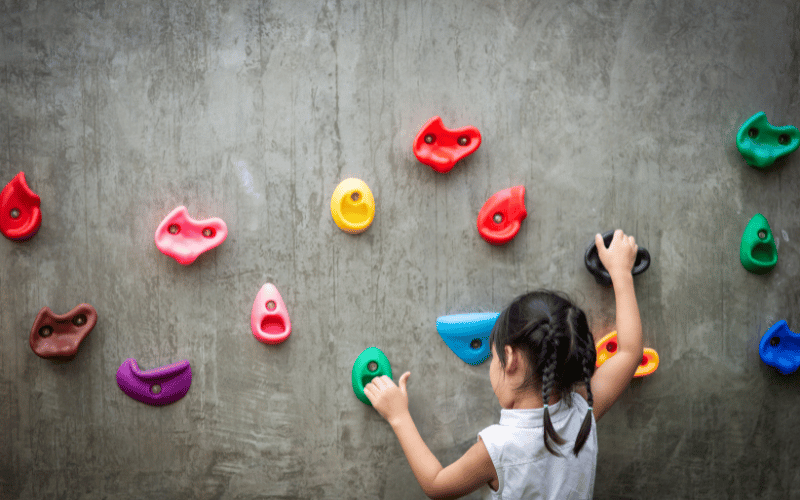
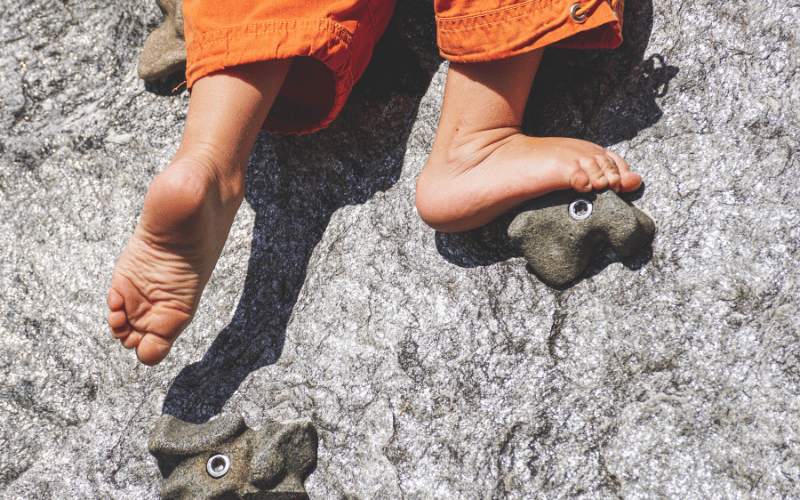
DIY Climbing Wall
A climbing wall is a great way to challenge kids’ strength and coordination.
Materials: Plywood, climbing holds (available online or at hardware stores), screws, and a drill.
Steps:
- Choose a sturdy surface, like a fence or the side of a shed, to attach the climbing wall.
- Cut the plywood to your desired size and sand the edges to prevent splinters.
- Secure the plywood to the surface using heavy-duty screws, ensuring it’s stable and won’t wobble.
- Attach climbing holds in a variety of patterns, leaving enough space between them for kids to climb comfortably.
- Add a soft ground cover, such as mulch or rubber mats, beneath the wall to cushion any falls.
Safety Tips: Always double-check the stability of the wall and anchoring points. Regularly inspect the holds and screws to ensure they remain secure.
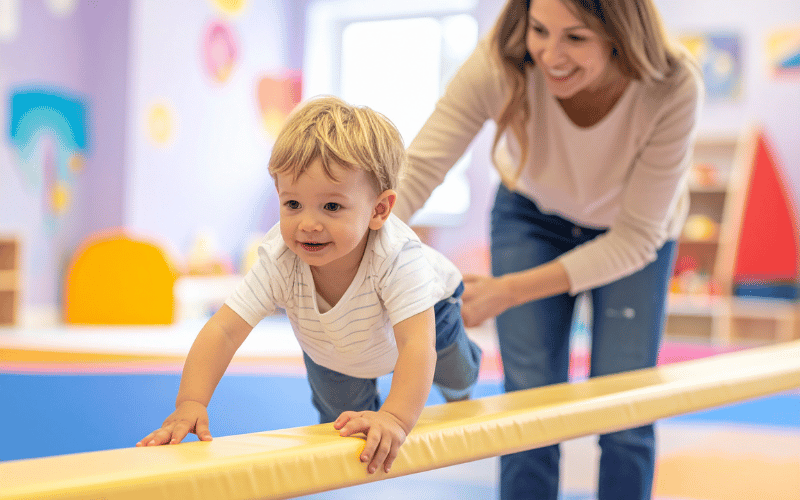
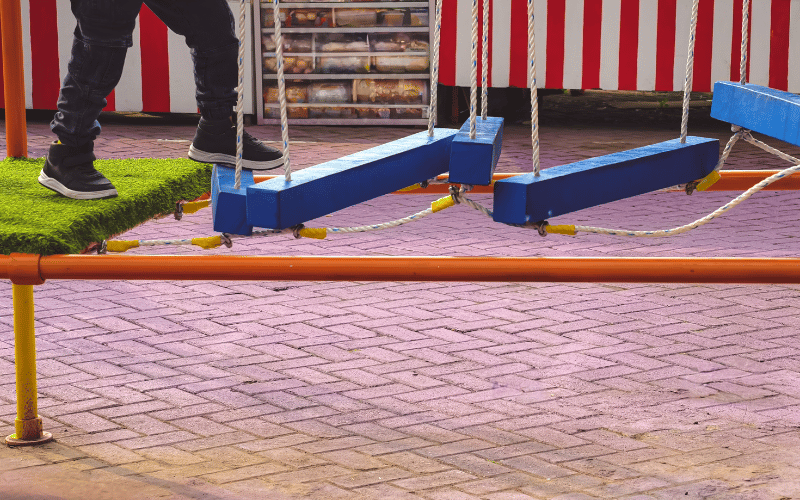
Balance Beam Fun
Balance beams are simple to make and provide endless opportunities for kids to practice coordination and balance.
Materials: Logs, cinder blocks, or treated lumber, along with sandpaper and outdoor wood sealant.
Steps:
- Choose your material—logs for a natural look or treated lumber for a more polished design.
- Sand all edges and surfaces to remove splinters or rough spots.
- Place the beam on cinder blocks or directly on the ground for varying heights. For added stability, secure the beam to the blocks with screws or brackets.
- Create multiple beams at different heights or angles to increase the challenge.
Safety Tips: Regularly inspect the beam for wear and tear, especially if it’s exposed to the elements. Keep the area around the beam clear of obstacles to prevent injuries.
Obstacle Course Adventures
Obstacle courses are a versatile and customizable way to keep kids moving and entertained.
Ideas:
- Tunnels: Use large cardboard boxes or collapsible play tunnels.
- Weaving Poles: Fill buckets with sand or rocks and insert stakes or PVC pipes for kids to weave through.
- Tire Stepping Stones: Arrange old tires in a line or pattern for kids to step or jump through.
Customization: Adjust the course based on the age and skill level of your kids. For younger children, keep the obstacles simple and low to the ground. For older kids, add challenges like timed runs or more complex layouts.
Safety Tips: Ensure all materials are stable and free of sharp edges. Supervise younger children to prevent accidents, especially on higher or more challenging obstacles.
By incorporating these active play zones into your backyard, you’ll create a space that encourages movement, builds gross motor skills, and keeps kids engaged for hours. Each project is not only budget-friendly but also adaptable to your space and your children’s needs.
Sensory and Creative Play Areas: Stimulating Imagination
Creating sensory and creative play areas in your backyard invites children to explore, imagine, and express themselves in ways that go beyond physical activity. These spaces encourage hands-on learning and creativity while providing endless opportunities for discovery. Let’s explore some detailed DIY projects to bring these areas to life.
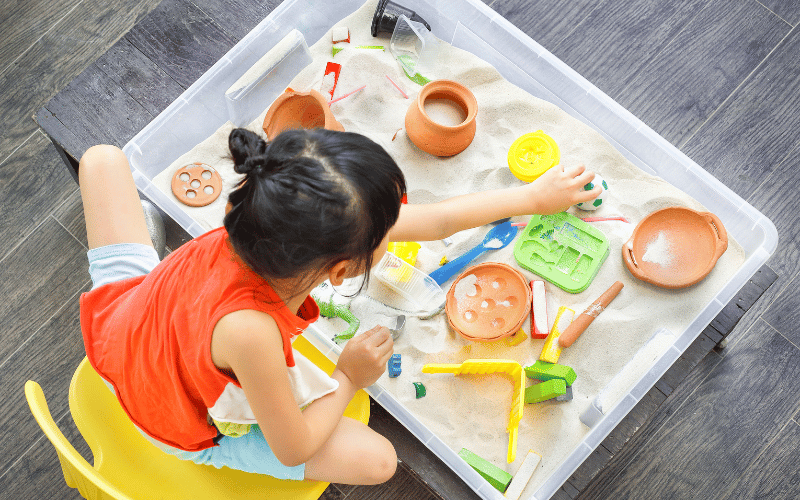
Sand and Water Station
A sand and water station is a classic sensory play setup that keeps kids engaged while stimulating their tactile senses.
Materials: An old table or wooden pallets, PVC pipes, funnels, plastic bins, and screws.
Steps:
- Repurpose an old table or build a sturdy frame using wooden pallets. Ensure the structure is stable and at a comfortable height for children.
- Attach plastic bins or tubs to the frame—one for sand and one for water. Secure them in place to prevent tipping.
- Add PVC pipes and funnels to create water channels or sand chutes for added fun.
- Place the station on a flat surface and surround it with a tarp or mat to make cleanup easier.
Tips: Keep the sand covered when not in use to prevent contamination from animals or debris. Regularly clean the water bin to ensure hygiene.
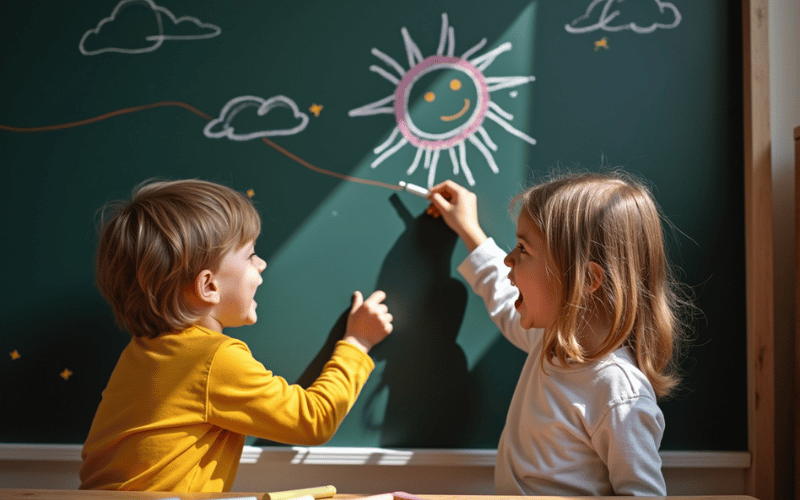
Outdoor Art and Chalkboard Wall
An outdoor art and chalkboard wall transforms any backyard into a creative haven where kids can draw, paint, and experiment with natural materials.
Materials: Plywood, chalkboard paint, weatherproof storage containers, and basic art supplies.
Steps:
- Cut a piece of plywood to your desired size and coat it with chalkboard paint. Apply multiple layers for durability.
- Attach the chalkboard to a fence or wall using screws or brackets. Ensure it’s securely mounted to withstand outdoor conditions.
- Set up an art station nearby with weatherproof storage for supplies like chalk, paintbrushes, and natural materials (sticks, leaves, or stones).
- Encourage kids to use the chalkboard for drawing or create nature-inspired art using the materials provided.
Benefits: This setup fosters creativity while keeping the mess outdoors. It’s also a great way to introduce kids to eco-friendly art by incorporating natural elements.
DIY Forts and Hideouts
Forts and hideouts provide kids with a magical space to let their imaginations run wild.
Ideas:
- Teepees: Use garden stakes or bamboo poles to create a simple frame. Drape a tarp or fabric over the structure and secure it with clips or ties.
- Cardboard Castles: Repurpose large cardboard boxes to build a castle. Cut out windows and doors, and let kids decorate it with paint or markers.
- Bamboo Structures: Use bamboo poles to create a lightweight, durable frame for a fort. Cover it with fabric or climbing plants for a natural look.
Customization: Add cushions, fairy lights, or themed decorations to make the space more inviting. For example, a pirate-themed hideout could include a treasure chest filled with toys, while a fairy garden fort might feature twinkling lights and flower garlands.
By incorporating these sensory and creative play areas into your backyard, you’ll provide children with a space that stimulates their imagination and encourages hands-on exploration. Each project is easy to customize, ensuring it fits your space and your kids’ unique interests.
Upcycled and Budget-Friendly Projects: Resourceful Play
Transforming everyday items into play equipment not only saves money but also adds a unique charm to your backyard. These upcycled projects encourage creativity, sustainability, and fun, all while being easy on the wallet. Let’s explore some practical and engaging ideas that turn discarded materials into playtime treasures.
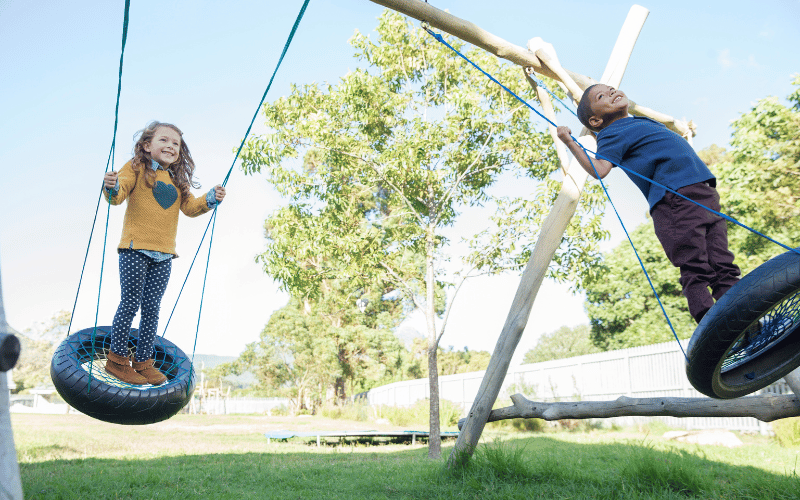
Tire Swings and Seating
Old tires can find new life as both play equipment and functional backyard additions.
Materials: Old tires, outdoor paint, sturdy rope, and a drill.
Steps:
- Start by thoroughly cleaning the tires with soap and water to remove dirt and debris. Let them dry completely.
- Paint the tires with outdoor-grade paint in bright, fun colors. This not only makes them visually appealing but also protects them from the elements.
- For a swing, drill drainage holes in the bottom of the tire to prevent water from collecting. Attach a sturdy rope through the tire and secure it to a strong tree branch or a swing frame. Double-check the knots and test the swing for stability before letting kids use it.
- As a bonus, use painted tires as modular seating or planters. Stack them to create colorful stools or fill them with soil and flowers to add a playful touch to your backyard.
Safety Tip: Regularly inspect the rope and branch for wear and tear to ensure the swing remains safe for use.
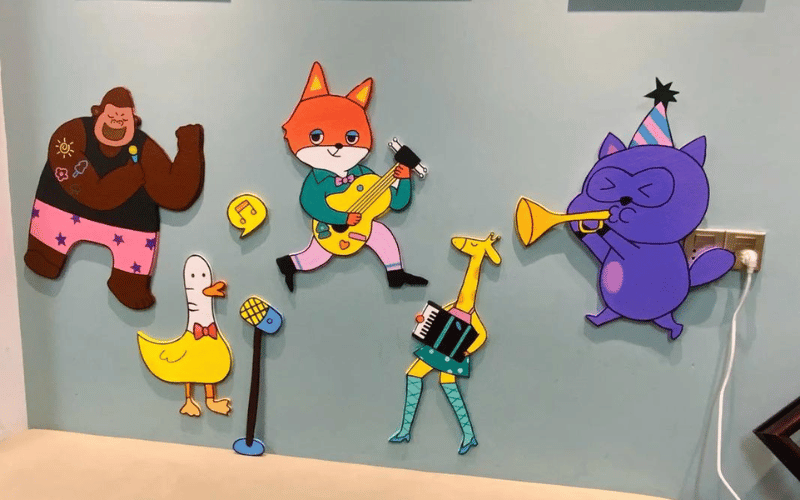
Music Wall
A music wall turns ordinary household items into an interactive sound experience for kids.
Materials: Old pots, pans, metal lids, PVC pipes, screws, and a wooden frame or section of a fence.
Steps:
- Gather a variety of items that produce different sounds when struck, such as pots, pans, and metal lids.
- Secure these items to a wooden frame or directly onto a fence using screws or hooks. Arrange them at varying heights so kids of all ages can reach them.
- Add PVC pipes as chimes or sound tubes for additional variety. Provide wooden spoons or mallets for kids to use as drumsticks.
- Encourage kids to experiment with creating rhythms and sounds, turning the music wall into a sensory and creative play experience.
Fun Factor: The variety of sounds and textures keeps kids engaged, and the wall can double as a fun way to introduce basic musical concepts.
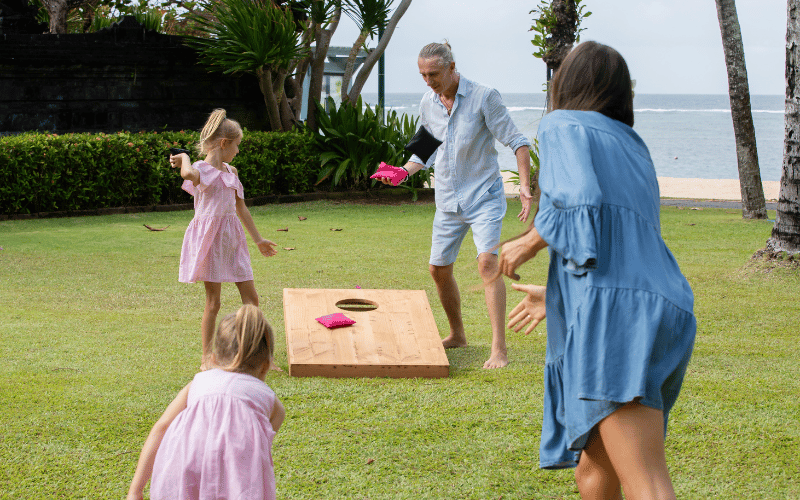
Water Balloon or Sponge Toss Game
This simple yet entertaining game is perfect for hot summer days and can be easily customized for different age groups.
Materials: Buckets, sponges, chalk, and water balloons (optional).
Steps:
- Use chalk to draw targets on the ground or a wall. Assign different point values to each target to add a competitive element.
- Set up buckets at varying distances to create additional challenges.
- For a reusable option, soak sponges in water instead of using balloons. Kids can toss the sponges at the targets or into the buckets for points.
- Adjust the rules based on the age and skill level of the players. For younger kids, keep the targets closer and larger. For older kids, increase the distance or add obstacles.
Customization: Incorporate themes like a pirate treasure toss or a carnival-style game to make it even more exciting.
By repurposing materials and embracing upcycled projects, you can create a backyard filled with resourceful play opportunities. These ideas not only save money but also teach kids the value of creativity and sustainability while keeping them entertained for hours.
Safety and Maintenance: Ensuring Long-Lasting Fun
Creating a safe and well-maintained play environment is just as important as designing the play equipment itself. By prioritizing safety checks, choosing the right play surfaces, and following a consistent maintenance routine, you can ensure your backyard remains a fun and secure space for years to come. Let’s break this down into actionable steps.
Safety Checks
Safety begins with the materials and construction of your play equipment.
- Use non-toxic, pressure-treated wood: When building structures like climbing walls or balance beams, choose wood that is both durable and safe for children. Avoid chemically treated wood that may leach harmful substances.
- Remove sharp edges and trip hazards: Sand down all edges and corners of wooden elements to prevent splinters. Keep the play area free of debris, such as rocks or loose branches, that could cause trips or falls.
- Regularly inspect screws, bolts, and anchors: Loose hardware can compromise the stability of your equipment. Check all fasteners monthly and tighten or replace them as needed. For swings or climbing walls, pay extra attention to load-bearing points.
Choosing the Right Play Surface
The surface beneath your play equipment plays a critical role in minimizing injuries from falls.
- Options: Mulch, pea gravel, rubber tiles, and grass are all popular choices. Each has its pros and cons. For example, mulch and pea gravel are affordable and easy to install, while rubber tiles provide excellent shock absorption but come at a higher cost.
- Recommendations: Always use soft surfaces under climbing structures or swings. For instance, a 6-inch layer of mulch or pea gravel can cushion falls effectively. Avoid hard surfaces like concrete or packed dirt, which increase the risk of injury.
Maintenance Tips
Consistent maintenance keeps your play equipment safe and extends its lifespan.
- Waterproof wooden elements annually: Apply a weatherproof sealant to wooden structures to protect them from moisture and prevent rot. Choose a non-toxic sealant that’s safe for kids.
- Store fabric items to prevent mold: Items like tarps, cushions, or fabric teepees should be stored indoors during rainy seasons. If they get wet, dry them thoroughly before storing to avoid mold and mildew.
- Inspect for weather damage after winter: Harsh weather can weaken materials or cause cracks. After winter, check for signs of damage, such as warped wood, rusted hardware, or worn-out surfaces, and address these issues promptly.
By following these safety and maintenance practices, you’ll create a backyard play space that’s not only fun but also secure and durable. These steps ensure that your investment in play equipment continues to bring joy while giving you peace of mind.
FAQs: Addressing Common Concerns
Q: What are the safest materials for DIY backyard play structures?
A: Use non-toxic, pressure-treated wood for durability and safety. Opt for smooth, sanded edges to prevent splinters. For hardware, choose galvanized or stainless steel screws and bolts to resist rust. Avoid materials with sharp edges or chemical treatments that could harm children.
Q: How can I waterproof wooden outdoor toys?
A: Apply a non-toxic, outdoor-grade sealant or wood preservative annually. Clean the wood thoroughly and let it dry before applying the sealant. Use a brush to coat all surfaces evenly, paying extra attention to edges and joints where water tends to collect.
Q: What are low-cost alternatives for playground surfaces?
A: Mulch and pea gravel are affordable and effective options for cushioning falls. You can also use sand for smaller play areas or repurposed rubber mulch for added durability. Grass works for low-impact zones but doesn’t provide as much shock absorption as other materials.
Q: How do I safely anchor a balance beam or climbing wall?
A: For a balance beam, secure it to the ground using brackets or stakes to prevent shifting. For a climbing wall, attach it to a sturdy structure like a fence or shed using heavy-duty screws and anchors. Always test the stability before allowing kids to use it.
Q: What backyard activities are best for toddlers?
A: Focus on activities that encourage sensory exploration and safe movement. Sand and water stations, low balance beams, and soft play areas with foam mats work well. Add simple items like stacking blocks, tunnels, or small slides to keep toddlers engaged and active.
Conclusion: Maximizing Backyard Play Potential
DIY backyard creations provide endless opportunities for fun, creativity, and family bonding. Start small by choosing a project that fits your space and budget, and adapt it as needed to suit your family’s needs. Let your imagination guide you as you design a space where kids can explore, move, and create. Take the first step today and transform your backyard into a play haven that inspires joy and connection for years to come.