
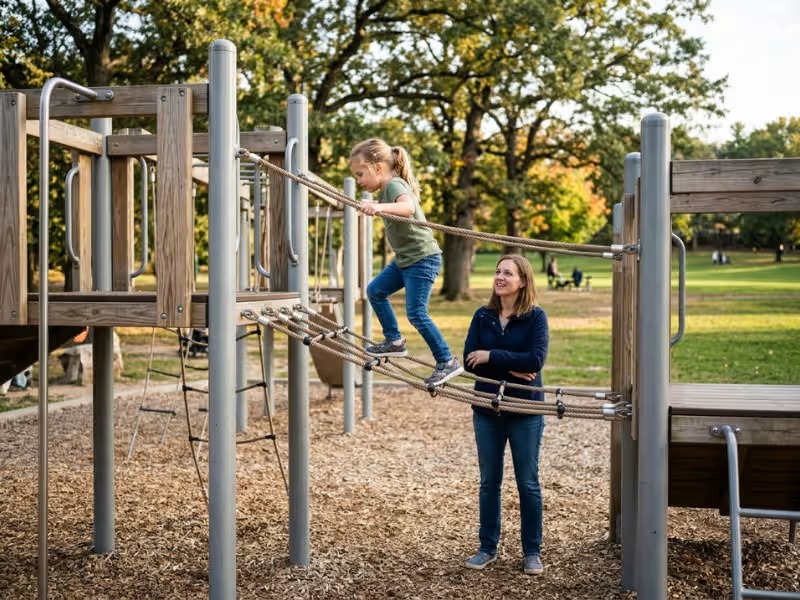
Your 5-year-old races up the toddler slide, then climbs the outside rails instead. She dangles from the swing set frame. She asks for “something bigger.”
Many parents notice this moment. They want to upgrade, but they worry. Move too soon, and a fall feels likely. Wait too long, and your child gets bored and stops building new skills.
I help families with this exact choice every week. This guide shows you clear signs to watch for and safe ways to step up.
It covers kids roughly ages 3 to 10, because readiness comes from skill, not a birthday.
Why Readiness Matters More Than Age
The age label on a playset tells you who the designer had in mind. It doesn’t tell you what your child can do today.
I see this gap all the time. Two 5-year-olds stand at the same ladder. One climbs up, turns around, and comes down with steady hands. The other freezes halfway and calls for help. Same age, very different readiness.
That’s why I treat age ranges as a starting point, not a rule. Harder equipment asks more of a child’s body and judgment. Before I suggest any upgrade, I look for five skills:
- Balance on narrow, raised, or wobbly surfaces
- Grip strength to hold on when their feet leave the ground
- Body awareness, so they know where their feet land and where the edge is
- Rule-following without constant reminders
- Self-control around risk, including the ability to pause and say “not yet”
Safety guidance points the same way. The U.S. Consumer Product Safety Commission groups playground equipment into broad age bands, such as 2 to 5 and 5 to 12. Each band covers kids with very different skill levels. The American Academy of Pediatrics stresses active play paired with active supervision. Manufacturers also set age and weight limits for each product.
Treat those limits as the minimum, not proof of readiness. Your child still has to show the skills.
To get a real answer, watch your child on the equipment they already use. Well-designed outdoor playground equipment makes these differences easy to spot, because balance, grip, climbing, and route choice all show up in real play. How your child moves there tells you more than any label can.
The Most Reliable Signs Your Child Is Ready
Readiness rarely arrives in one big moment. It shows up in small habits you can spot in a single afternoon at the park.
I sort these signs into three groups: body, judgment, and feelings. Your child needs all three. Strong arms without good judgment can still lead to a hard fall.
Physical Signs
Start with the body. These signs are the easiest to see.
- Climbs without a boost. Your child picks their own hand and foot holds. They don’t wait for you to lift them to the next step.
- Balances on narrow or moving parts. On a low beam, wobble bridge, or stepping logs, a ready child walks across, adjusts, and keeps going. They don’t crawl or grab you at every step.
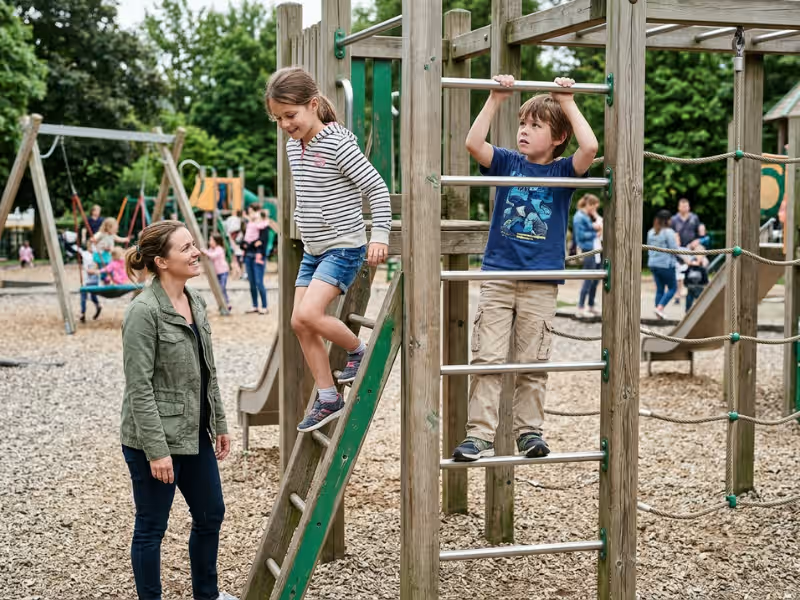
- Grips and hangs with control. They can hang from a bar for about 10 seconds, then let go on purpose and land on their feet.
- Jumps and lands softly. Look for bent knees and both feet landing together. A child who stumbles forward after a small jump needs more time at lower heights.
- Gets down as well as up. This sign matters most to me. Many kids can climb up. Fewer can turn around, find the next foothold, and climb back down calmly.
When I look at a play structure with a family, I always ask, “How does your child come down?” If the answer is “I lift them,” the next level can wait.
Behavioral and Judgment Signs
Strong muscles cover only half of readiness. Bigger equipment brings more height, more speed, and more kids in the same space. Your child’s judgment has to keep up.
- Follows rules without reminders. They slide down feet first and sit on the swing. You don’t repeat the rules every visit.
- Watches and learns. They study an older child on the monkey bars, then try the same move.
- Waits and shares space. They wait at the top of the slide until the bottom clears. They walk around swings, not in front of them.
- Responds to warnings. When you say “Stop” or “Check below you,” they pause right away and look.
- Picks challenge, not chaos. They choose the harder route on purpose. They don’t race up the slide while three kids come down it.
That last point tells me a lot. Some kids look for a puzzle to solve. Others look for a thrill. The puzzle solvers handle bigger equipment much better.
Emotional Signs
Feelings drive many playground choices. Watch how your child handles a little fear and a little failure.
- Confident, not reckless. They try new things with a plan, not a wild leap.
- Handles frustration. They miss a bar, shake it off, and try again.
- Bounces back from small falls. A scraped knee brings a few tears. Then they head back to play.
- Asks for more. They say things like “This is too easy” or “Can we go to the big playground?”
- Stops when unsure. A ready child can say “I don’t want to” halfway up and climb down calmly. That pause shows self-control, not weakness.
Signs Your Child Is Not Ready Yet
Some signs tell you to hold off for now. They don’t mean anything is wrong. Your child just needs more time at the current level.
- Freezes halfway up a ladder or net and can’t move either way
- Needs you to lift, carry, or rescue them on equipment they use often
- Ignores rules even after reminders
- Wants speed and height but loses control, like flying off the slide end
- Panics at heights that other kids their age handle calmly
If you spot two or more of these, keep building skills on familiar equipment first. A short playground visit can show you where your child stands.
A Simple Playground Test Parents Can Use
You don’t need a coach or a special app. You need 10 minutes, a bench with a good view, and a little patience.
On your next park visit, let your child play. Don’t cheer, guide, or step in unless safety calls for it. Then watch for these five things:
- Do they seek challenge on their own? Notice whether they head for the taller ladder or the harder route without your suggestion.
- Can they repeat it with control? One lucky climb proves little. Look for the same move done smoothly three or four times in a row.
- Can they get up and down safely? A calm, steady descent matters as much as reaching the top.
- Do they pause and assess? Ready kids stop for a second before a gap or a high step. They look, plan, and then move.
- Do they respond to peer traffic? See if they wait for a clear slide, slow down near smaller kids, and steer around moving swings.
Jot a quick note on your phone after each visit. Two or three visits give you a much clearer picture than one.
Then use this simple read:
- 4–5 signs look stable: Your child is likely ready. Consider one step up.
- 2–3 signs come and go: Keep building skills on current equipment, and mix in small new challenges.
- Lots of bravado, little control: That isn’t readiness. A fearless child who can’t climb down safely still needs time.
What “More Challenging” Actually Means
When parents hear “bigger equipment,” most picture a taller slide. Height is only one way to raise the bar, and it’s often the riskiest one to change first.
When I plan an upgrade with a family, I look at six kinds of challenge:
- Height asks a child to manage fear and fall distance.
- Coordination asks them to move arms and legs in sync, like on a rope ladder that shifts under each step.
- Grip demand tests how long they can hold their own weight.
- Route complexity gives them more than one way up, so they have to choose.
- Speed shows up on swings and slides.
- Decision-making ties it all together: where to put a foot, when to wait, when to turn back.
A 4-foot climbing net with uneven holds can challenge a child more than a 7-foot ladder with flat rungs. The net looks smaller, but it asks for more skill.
That’s why I suggest upgrading by skill pattern, not by size. Custom playground equipment helps here, because it lets you match each element to your child’s level instead of jumping from one fixed setup to another.
Start with what your child already does well. Maybe they climb straight up with ease. The next step could be an angled climb or a short sideways traverse, not a taller tower.
Smarter Upgrade Paths by Age and Skill Level
Age bands give you a rough map. Your child’s skills tell you where to step next.
Each stage below moves from what kids usually master first to a sensible next challenge. Use the age as a guide, and let the skills make the final call.
Ages 4–5: From Toddler Play to Beginner Challenge
Kids this age want “big kid” equipment. Their grip and balance often lag behind their courage, so small, steady steps work best.
- Slides: If your child handles a 3- to 4-foot toddler slide with ease, try a 5- to 6-foot slide. Choose one with a covered top platform and side rails.
- Swings: Once they sit upright and hold the chains in a bucket seat, move to a standard belt swing. Stand close the first few times, and keep the arc low.
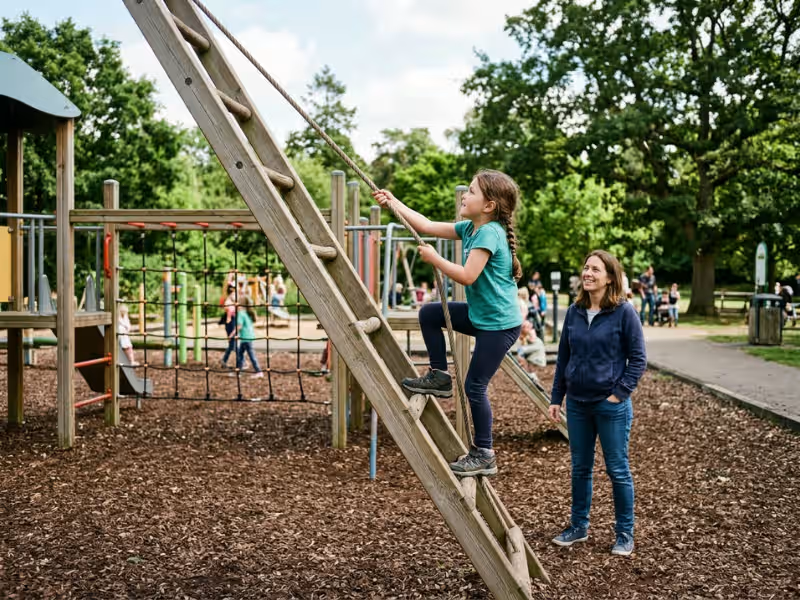
- Climbers: A child who walks up step-style climbers can try an angled ladder next. Angled rungs build hand-over-hand climbing without a straight vertical drop.
For upper-body play, start with a single bar or two rings set low enough that your child’s feet can touch the ground. That builds grip before any real hang.
Ages 6–8: More Coordination, More Height, More Decision-Making
This stage brings the biggest skill jumps I see. Kids can now plan moves, copy older children, and handle equipment that shifts under them.
- Monkey bars: Start with a short run of 4 to 6 rungs. Your child’s feet should hang about a foot above the surfacing. Crossing two or three bars still counts as progress.
- Rope ladders and nets: These wobble with every step, so they train coordination fast. Pick one with a firm handhold at the top and an easy step-off onto a deck.
- Climbing walls: Look for walls under 6 feet with big, well-spaced holds. A gentle slant makes the first climbs easier.
- Multi-path structures: Towers with two or three ways up, such as stairs, a ladder, and a net, teach kids to pick a route that matches their skill that day.
- Balance elements: Stepping pods, low beams, and wobble bridges teach careful foot placement for taller equipment later.
Here’s a tip I give families. Watch which route your child picks when nobody tells them. If they choose the hardest one and finish it calmly, they’re ready for more.
Ages 8+: Advanced Challenge with More Independence
Older kids need challenge that feels real. Without it, they invent their own, often on top of the swing beam. Bigger setups give that energy a safer outlet.
- Tall climbing nets and domes: Pick designs where a slip lands your child on the net, not the ground.
- Multi-level forts: Two decks linked by ladders, bridges, and a slide let kids plan their own routes. Check that every upper level has guardrails.
- Longer overhead routes: Extend the monkey bars, add swinging rings, or set up a traverse with mixed grips.
- Zip lines and ninja-style elements: These suit kids with strong grip and steady landings. Keep zip lines low and short, with a clear landing zone. Add ninja holds one at a time.
At this stage, you can step back from hands-on spotting. Stay within sight, and check the setup often.
Upgrade by One Level, Not Three
Many parents buy a structure that is taller, longer, and harder to climb all at once. Their child then faces three new problems at the same time.
Change one thing per upgrade:
- Higher: the same equipment type, with a bit more height
- Longer: the same height, with more distance, like extra rungs
- More complex: the same size, with trickier holds or routes
Once your child masters that change, pick the next one. This pace builds skill without a sudden jump in fall risk.
Safety Checks Before You Upgrade
A ready child still needs a safe setup. Before you buy or install anything bigger, walk through these four checks. They take less than an hour and prevent most of the problems I see after an upgrade.
Match the Equipment to the Child, Not the Marketing Photo
Start with the label. Every quality playset lists an age range, a maximum user weight, and sometimes a height range. Treat those numbers as hard limits.
Then look past the product photo. A smiling 6-year-old at the top of a tower tells you nothing about your cautious 6-year-old.
Compare the specs to what your child does today. Check the deck height, the rung spacing, and the reach to the first monkey bar. If your child can’t reach the first bar from the platform, the setup isn’t right yet.
Check Surfacing, Spacing, and Fall Zones
Most serious playground injuries come from falls. The ground under the equipment matters as much as the equipment itself.
Grass, dirt, and concrete don’t absorb impact well enough. Choose one of these instead:
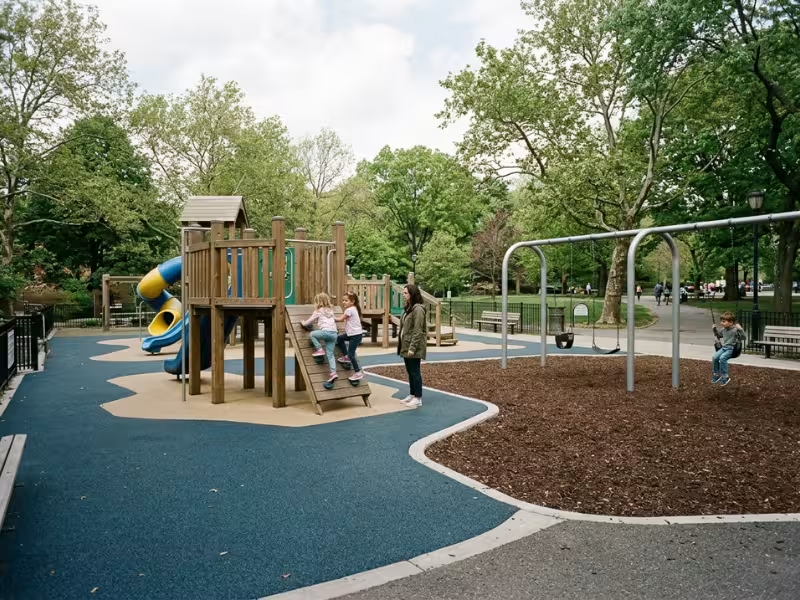
- Wood chips or mulch: Install 12 inches. It packs down to about 9 inches over time.
- Rubber mulch: It lasts longer and stays put better. Follow the depth rating for your deck height.
- Poured-in-place rubber: It costs more but needs little upkeep. Confirm its fall-height rating matches your tallest platform.
Rake loose fill every few weeks. Kids kick it away from slide exits and under swings.
Then check the space around the equipment:
- Fall zones: Keep at least 6 feet of surfacing in all directions.
- Swings: Measure from the ground to the top pivot. Clear twice that distance in front and twice behind. An 8-foot beam needs 16 feet each way.
- Spacing: Leave enough room so a child coming off one structure never lands in the path of another.
Look at Access, Exits, and How a Child Gets Down
Every raised platform needs a safe way off. A tower with only a slide forces a nervous child to slide or get stuck.
Check these points:
- Each deck has at least two exits, such as a slide plus a ladder or stairs.
- Platforms over 30 inches have guardrails or barriers.
- Ladders have handholds at the top, so kids can turn around and climb back down.
The way down should feel as easy as the way up.
Set Simple Rules Before the First Use
Explain the rules before your child touches the new equipment. Kids accept rules more easily on day one than after habits form.
Keep the list short:
- One child at a time on the slide and monkey bars.
- Sit on swings. Never stand or twist the chains.
- Land with bent knees and both feet.
- No play on wet or icy equipment.
- Shoes on, no drawstrings, and no bike helmets on the playset.
Post the rules near the structure, and repeat them for the first week.
How to Make the Transition Without Pushing Too Fast
Most upgrade problems I see don’t come from the equipment. They come from the pace. A parent sees real progress, gets excited, and jumps three steps ahead in one weekend.
A slower plan works better, and the skills tend to stick.
Add one new challenge at a time. Freestanding playground equipment works well here, because you can introduce one new element without replacing the whole play area. Add a rope ladder or a short run of monkey bars, then let your child live with it for a few weeks. When everything is new at once, kids can’t tell which part worries them, and neither can you.
Test at the park before you buy. Public playgrounds work like a free trial. Find one with a taller slide or a small climbing wall, and watch your child over two or three visits. If they keep returning to the same piece, you’ve found your next upgrade. If they avoid it, you just saved a few hundred dollars.
Spot early, then step back. On the first few tries, stand close enough to put a hand near their back or hips. Don’t hold them. Just be there. Over the next sessions, move back a little at a time: arm’s length, then a few feet, then the bench. Tell your child what you’re doing. “I’ll stand right here today” builds more trust than quietly walking away.
Let them repeat before you raise the bar. One good crossing doesn’t mean the skill is solid. I like to see the same move done calmly on at least three separate days.
Stop while confidence is still high. End the session after a strong attempt, not after the slip that comes from one try too many. Kids remember how a challenge ended, and a confident finish brings them back eager tomorrow.
If your child backs away from a new piece, that’s okay. Return to the easier version for a week, then offer it again.
FAQs
What age is appropriate for monkey bars?
Many kids start trying monkey bars around age 4 or 5. A full crossing often comes later, somewhere around 5 to 7, depending on grip and confidence.
Grip strength matters more than age. If your child can hang from a single bar for about 10 seconds and drop to their feet on purpose, they can try a short run. For 4- and 5-year-olds, keep the bars around 5 feet high or lower.
How do I know if my child has outgrown toddler playground equipment?
Watch how they use it. These signs show your child has outgrown it:
- They finish the toddler slide in seconds and climb the outside instead.
- Their knees bump the deck or their head nears the roof.
- They invent risky stunts, like standing on rails, because the normal route bores them.
- They ignore the toddler area and head for the big-kid structure.
Check the label, too. Once your child passes the listed height or weight limit, move on, even if they still enjoy it.
Is challenging equipment safe for a cautious child?
Yes, as long as you match the challenge to the child. Cautious kids often handle new equipment well because they stop, look, and plan before they move.
Pick challenges that test skill, not height. A low climbing net or a wobble bridge suits a careful child better than a tall slide. Let them watch others first, and never pull or push them up.
What safety surfacing works best under a backyard playset?
For most families, I recommend one of these:
- Wood chips or mulch: Lay 12 inches. It costs the least but needs regular raking.
- Rubber mulch: Lay at least 6 inches. It stays in place better and lasts for years.
- Poured-in-place rubber or rubber tiles: It costs the most but needs very little upkeep. Match its fall-height rating to your tallest deck.
Skip grass, packed dirt, and concrete. Extend the surfacing at least 6 feet in every direction.
Should I supervise my child the whole time on new equipment?
Yes, at first. For the first few weeks, stay close, put your phone away, and keep your eyes on your child.
As your child repeats the move with control, step back gradually. Kids under 6 still need an adult watching at all times. Older kids need less hands-on help, but someone should still keep them in sight.
What is the difference between risky play and dangerous play?
Risky play involves a risk your child can see and judge, like climbing higher or crossing a wobbly bridge. Your child decides how far to go, and that builds judgment.
Dangerous play involves a hazard your child can’t see or control. Examples include a loose bolt, a cracked rung, missing surfacing, a snagging drawstring, or a gap that can trap a head. Your job is to remove these hazards so your child can take smart risks safely.
How can I test new skills before buying bigger equipment?
Visit two or three public playgrounds with taller slides, climbing walls, or longer monkey bars. Watch which pieces your child returns to and how they get down.
Kids’ gym classes, open play at a ninja gym, and climbing centers with kids’ sessions also work well. Trained staff stay nearby while your child tries new moves.
If your child uses the same element calmly on three separate visits, add that one piece at home.
Let Skill Set the Pace
Your child’s birthday doesn’t decide when they’re ready for bigger equipment. Their body and behavior do. Look for steady motor control, rule-following without reminders, calm recovery from small setbacks, and the ability to stop when something feels wrong.
When those signs line up, step up slowly. Change one thing at a time: a little higher, a little longer, or a little trickier. Skip the jump from a toddler set straight to a tall tower.
On your next park visit, find a bench, stay quiet, and watch your child for 10 minutes. Note which 3 to 5 readiness signs you see. Then pick one upgrade that matches what your child already does well.
The right challenge at the right time builds skill, confidence, and a real love of play.